Showing posts with label Baking. Show all posts
Even though I'm working out
trying to lose some weight
and get in shape
 
I still have a horrible sweet tooth
Sometimes there's no fighting it
and it has to be filled.
 
This is my easy solution!
 
 
The WORLDs Easiest
Peanut Butter Double Chocolate Brownies!


You'll start with a cheap-o box of brownie mix
(this one came from Aldi's)
Mix the package according to the box directions.

 
Pour the brownie mix into a prepared pan.
Next you'll need some peanut butter and chocolate chips.

 
With a tablespoon, drop 5-6 dollops of peanut butter all over on the mixture.
Stir slightly with a knife.
Be careful to not touch the bottom or the sides of the pan with your knife.
 
Next add 5-6 more good sizes drops of peanut butter into your pan.
Do not stir this time.
 
Add a layer of chocolate chips on top of the brownie mixture.
Bake according to package directions.


These beauties are the end result.
Yummy
Gooey
Peanut-buttery!!!
 
Can't beat that!
The brownies come out moist and tall!
I love to bit into the swirls of peanut butter...always reminds me of a peanut butter cup!


I love that these treats are easy to whip up for the family
or yourself.
That's how I like to eat them!
 
Thanks so much for stopping by today - have a great weekend!

I thought it was the funniest thing,
the other day my oldest son Ashton
said he had been in the mood from some my Pumpkin Bread
and could I make some for him.
 
Of course, I can't turn down such a sweet request
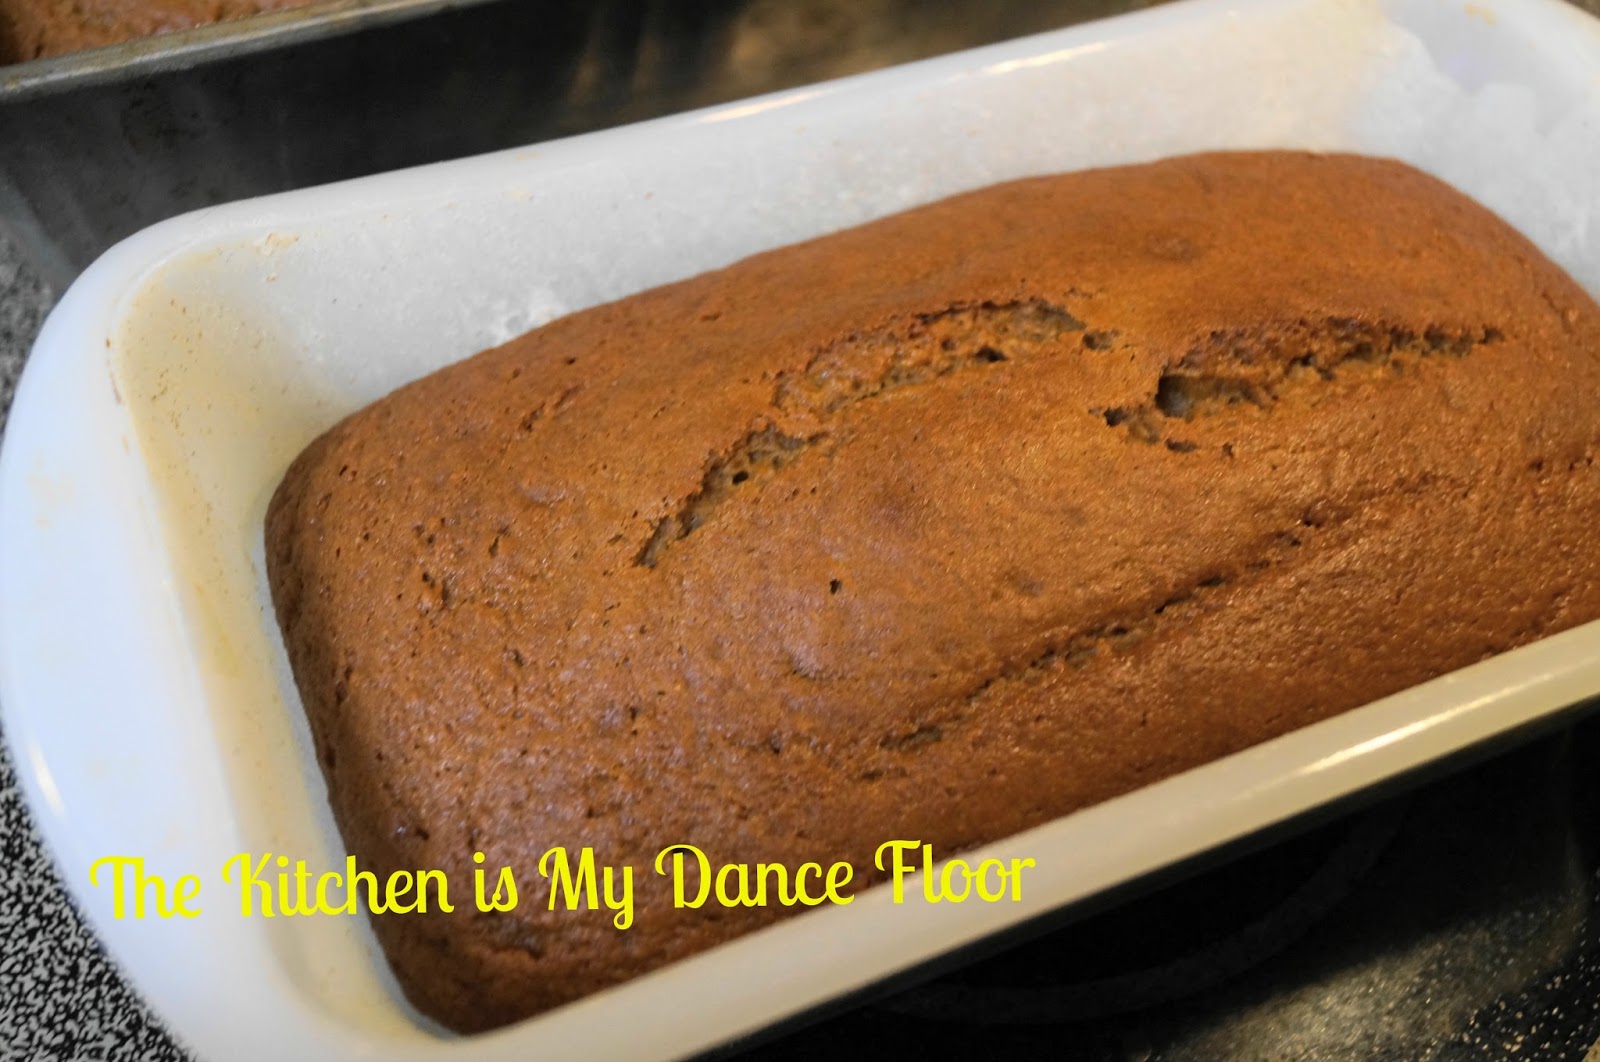
so I made up these two beautiful loaves for the boys.
 
 
Both loaves were completely gone
within three days!
 
These kids (and the hubby)
love some pumpkin bread!

 
Here's how you can make some to share with your family too...
 
 
Easy Spicy Pumpkin Bread
 
2 cups all purpose flour
2 teaspoons cinnamon
1 teaspoon pumpkin pie spice
1 teaspoon baking soda
1/4 teaspoon baking powder
1/2 teaspoon salt
1 3/4 cup sugar
1/2 cup applesauce
1/4 cup vegetable oil
3 large eggs
1 1/2 teaspoon vanilla extract
16oz pumpkin puree
 
 
Preheat oven to 350 degrees.
 
Mix together flour, cinnamon, baking soda, baking powder, salt and sugar together until well combined. I used my stand mixer for this.
 
Add to the dry ingredients the applesauce, oil, eggs and vanilla. Mix again until well mixed.
Finally add the pumpkin. Stir in the pumpkin until just combined.
 
Pour into two greased and floured bread pans.
 
Bake for 1 hour 15 minutes.
 
 
*NEW* Printable Version - Easy Spicy Pumpkin Bread


I hope your family enjoys this yummy pumpkin bread as much as mine did!
I'm so excited that fall is here
it's my favorite time of the year!
 
I've already bought our passes to the pumpkin patch
(we have a HUGE one...it's a big deal)
....you can check it out here...
I love everything about fall!
 
Thanks so much for stopping by today!


My sons school has a yearly 'Open House'
this includes a raffle and bake sale

I always like to try and make something for the bake sale
This year, I loved what I cake up with!

Start with a box cake mix and make some cupcakes.


I let my cupcakes cool completely overnight.

The other supplies you'll need are

2 dozen paper cups (mine have footballs on them)
colored sprinkles
treat bags
ribbon
forks
white and chocolate frosting
chocolate chips


I started by putting one cupcake (without its wrapper)
at the bottom of each cup.


Then I started with the layers.


The first to go in is a dab of chocolate frosting on each one.


I hadn't originally thought of adding chocolate chips.
But I had half a bag in my pantry
and I thought they'd be a perfect addition!


I was right.
They were.


When topping everything off with the white frosting,
I did put on a Wilton tip.
I thought it gave everything a little bit fancier look.


And since we're in Husker country
(Nebraska)
Everyone here is crazy about Nebraska football..


So I added red sprinkles to each cup.


Aren't they pretty?


Then all the cups when into the treat bags.


My treat bags came with twist ties.
Here are some pictures showing how I attached the forks.


This made it alot easier when is came to attaching the ribbon!


I finished everything off with some red ribbon!
I LOVE the finished product!!!


These sold out at our bake sale for $2 a piece!


You could do this idea for anything.
Change the cup for whichever theme you're going after!


Add different colored sprinkles and ribbons for whichever team your rooting for.


This might be one of my favorite project to date! 


Colton wanted his picture in front of the 'football cakes'


Thanks so much for stopping by on this day!
I really appreciate it!

Please take a minute to follow me on 


I have only recently discovered the many uses of Coconut Oil. 
I bought it to use as a weekly conditioner for my hair.
(love it!!!)
Today, I decided to try it out in some muffins. 


Here's how you make these great muffins
1 3/4 cup all-purpose flour
1/3 cup sugar
2 teaspoons baking powder
1/4 teaspoon salt
1 beaten egg
3/4 cup of milk
1/4 cup coconut oil
3/4 to 1 cup of blueberries (fresh or frozen)
the juice of half an orange
orange zest


Combine all your dry ingredients and mix well.
In another bowl combine egg, milk, oil orange juice and zest.
This will take extra mixing! Mix until very well blended.
Add wet ingredients to your dry.


Mix until moistened.
The batter will be thick....very thick.
I had to take it out by hand and roll into balls to place into the muffin try. 
Bake at 400 degrees for 18-20 minutes


The result was a moist, yummy muffin!
You'll also get the health benefits from the blueberries and the coconut oil - this is all around a great muffin! 
My kids gobbled them right up!

Enjoy!

Blueberry Orange Muffins with Coconut Oil

Thanks so much for stopping by!


We're trying to get the kids away from eating sugary cereals everyday for breakfast. I've been trying to find some alternatives that are healthy for them and still fill their bellies with the nutrients they need to keep their brains working!

I had a few apples in the fridge, so I decided to make some apple muffins with them. I used this recipe from Betty Crocker for Zucchini Bread and just made the old swtich-a-roo for apples!

I also switched out white flour for whole wheat flour and oil for apple sauce.

3 cups shredded apples (about 3)
1 2/3 cup sugar
2/3 overflowing cup apple sauce
2 tsp vanilla
4 eggs
3 cups whole wheat flour
2 tsp baking soda
1/2 tsp cinnamon
1/2 tsp pumpkin pie spice
3 1/2 tsp baking powder


First, I put all my dry ingredients into the mixer and let them get good and mixed. 


I started out with three apples. I cored and peeled them, they needed to be shredded and the easiest way to do that is in the food processor


Once you add all of your wet and dry ingredients together, the mixture will seem really thick and heavy. Not to worry...all in well in Apple Bread Town!


The "muffins" don't have to be muffins, if you prefer a bread...make a loaf of bread. Anything in the shape of a muffin make my kids want to eat them, so I went with muffins.

If you're making bread - make sure to grease and flour your pan
Otherwise, pull out your muffin tin and some cool liners....and fill each one about 3/4 of the way full.


For muffins, you'll bake these bad boys in a 350 degree oven for 20-25 minutes.
For bread, you'll bake it at 350 degrees for 50-60 minutes. 

To make sure they're done, stick a tooth pick in the middle and hope that it comes out clean, if it doesn't - try another 5 to 10 minutes in the oven. 

These muffins are awesome! My kids and hubby gobbled them up for breakfast! They store great in an air-tight container in the fridge. I set enough out in the morning on the counter and in about 10 minutes, they were ready to go! 

You could also add some ground flax seed to these for the added health benefits or drizzle them with some icing if you just feel like having something sweet! Raisins would be good too...or nuts!

Another bonus of this recipe is it's really easy to cut in half for a smaller family.

Either way - these are some yummy muffins!


Thanks so much for stopping by! 
Make sure and PIN this recipe and follow me on Pinterest!


Linking up to:


I LOVE sweet cornbread!!! I've lived off boxed cornbread for years and never thought to venture out on my own until a few weeks when I was looking through AllRecipes.com and found this beauty: Golden Sweet Cornbread!! I always thought it would take forever to make homemade cornbread - but I was wrong...this stuff is from the mixing bowl to the table in 30 minutes, and everything it takes - you already have around your kitchen. This cornbread is a perfect pairing with a great chili.

Oh My GOODNESS! It's sweet but not too sweet, it's moist and doesn't even need butter. 
You've gotta try this!

Golden Sweet Cornbread from AllRecipes.com 


INGREDIENTS:
1 cup all-purpose flour
1 cup yellow cornmeal
2/3 cup white sugar
1 teaspoon salt
3 1/2 teaspoons baking powder
1 egg
1 cup milk
1/3 cup vegetable oil
DIRECTIONS:
1.Preheat oven to 400 degrees F (200 degrees C). Spray or lightly grease a 9 inch round cake pan.
2.In a large bowl, combine flour, cornmeal, sugar, salt and baking powder. Stir in egg, milk and vegetable oil until well combined. Pour batter into prepared pan.
3.Bake in preheated oven for 20 to 25 minutes, or until a toothpick inserted into the center of the loaf comes out clean.


When baking, I like to get everything out at the start - then I know that I'll have enough of every item that I need. BTW, I am in love with my measuring cups from Williams Sonoma, a birthday gift from my best friend! 

Measure everything into you bowl and stir with a fork - but with cornbread it's important to not over-stir. You still want it to have a grainy appearance. 

I used a 9 inch square pan for mine because it's easier to cut. 


I am in love with this cornbread! It's so, so SO yummy! Like I said before, you almost don't need any butter for it. Try it...you'll like it! 


What kind of cornbread do you like? Sweet? Cake like? Dry? With real corn in it? Skillet fried?
Feel free to leave links in the comments to your favorite recipes! 


Linking up to:
Do you love Pioneer Woman as much as I do?

I love reading Ree's daily posts. She seems like such a sweet person. I really love finding new recipes on her site. We eat Chicken Spaghetti at least 3 times a month! Seriously. That stuff is good.

I've tried several recipes out of her cookbook and they were all amazing. I now have a whole new way of making pot roast that it way better then the way I use to do it. I'm in love with her chicken fried steak and we love love love those cinnamon and sugar muffin things. I gave some to the neighbor last time I made them...I thought she was going to kiss me she was so happy to get them.


But, in all this time that I've owned Ree's cookbook The Pioneer Woman Cooks, the cinnamon rolls have always scared me. I've never really tried to make homemade, from scratch bread. I make bread from the bread machine all the time. But never from scratch.

I've spend the last couple of years pouring over that cookbook over and over again and always looking at the recipe for the cinnamon rolls but never having the balls to really make them. The doubts would roll through my head.

It'll take hours to make those. When will I find that kind of time?
What if I screw it all up? I'll have wasted all that time and energy?
Who will I serve 40+ cinnamon rolls to?
I can't make bread! Are you crazy!

All these doubts would roll through my head. Until last weekend. I decided to bite the bullet and just do it.

You need a ton of milk and flour to make those, so I went to the store and bought what I needed. I figured if I had everything I would need, there would be no excuse to NOT make them.

I told my husband my intentions. He didn't have the doubts I did. He was just excited to have some fresh baked cinnamon rolls.

So, I moved on.

I mixed and waited and rolled and waited.
I melted butter and floured and measured.

When all was said and done. It had really only taken me a little over an hour (other then the hour of rising - but I don't count that since I left for a bit during this stage). But I did it. The table was covered in flour and butter and sugar and cinnamon. The kitchen was a wreck. But I did it.

I was so proud. Really. I was beaming. 

I put the first batch in the oven. My oldest son kept running upstairs asking if they were done yet.

I was getting nervous. What if they are gross? I probably added too much sugar or not enough cinnamon. Oh no.

The first batch came out, I poured the frosting and cut the first bites for everyone.

They were heavenly. Pure heaven.

I had tamed the beast. 

I ended up taking a batch to the neighbors and a pan to our church group. Everyone raved. Everyone told me how brave I was to go after the Pioneer Women cinnamon rolls. Apparently I wasn't the only one who was scared.

I'm glade I pushed myself. I need to learn to trust my skills more then I do. I'm sure I have some other beasts that need to be tamed.

What are some beasts that you need to tame? What's holding you back?


My oldest son, Ashton takes his lunch to school. I've found that it's much, much cheaper then buying him school lunches everyday and after reading about all the fat, sodium and preservatives in school lunches - I thought this would be much healthier for him.

The problem of course with packing lunches everyday is offering variety. I could pack sandwiches, chips and a drink everyday - but I have a feeling that Ashton would get burnt out pretty quickly. So, I've been coming up with some ideas to make ahead of time and freezer for his lunches.

These PB&J Muffins are so easy to make - all ingredients go straight into the food processor (one of my fave kitchen gadgets!)


For this recipe, I prefer to use whole wheat flour. The muffins would be a little more moist with regular white flour, but I think this is a great way to add whole wheat into Ashton's diet (and he doesn't even notice!)


Toss all ingredients into the food processor. If you're kids are cooking with you - this is a great job for them!


Pulse the processor until everything is mixed. This doesn't take long! Make sure and scrape down the sides at least once to get everything mixed well.


You can use cupcake liners...but I find it just as easy to spray the muffin tin down really good with cooking spray. I've also made a bite-sized version of this muffin by using mini muffin tins. Great for little hands!


Using a large spoon load the muffin cups up. This recipe could easily make 2 dozen muffins - I opted for 1 dozen larger muffins.


While the muffins are in the oven, I got started with my jelly. Since I have all of the Wilton bags and tips, I used those. I used one of the largest tips I have. If you want to use a plastic sandwich bag with the tip cut off - that might work too.

When filling my pastry bags, I like putting them upside down in a drinking up. Hands free work!


Any kind of jelly or jam will work for these muffins!


My muffins came out HUGE!!! They made the whole house smell SO GOOD!


Dump your muffins onto a cooling rack. Make sure your husband and kids stay clear....muffins always seem to disappear when they are near.


Don't let the muffins cool all the way, it makes piping the jelly in harder. I filled the muffins over and started filling them with jelly. (I used a glass just for a picture) You'll need to figure out for your muffin size how much jelly is needed. I just squeezed until I could almost feel it on the outside of the muffin.


Here's where this can get a bit tricky. Jelly is messy. I've found the best way to control the goo is to put the muffins upside down back in the muffin tins. Once you're finished filling all the muffins - put them (while still in the tray) straight into the freezer for at least an half hour. Note: The jelly won't freeze 100%.


Once the muffins are froze place them in a large freezer storage back. Store them in the freezer. I pack Ashton's lunch the night before and then leave his lunch in the fridge to give the muffins time to thaw out overnight.

When I make these muffins, my hubby always insists that I leave a few without jelly - his fave way to eat them is warm, sliced and spread with honey!


These muffins are a great way to change up lunches! You can add anything you like to these muffins - flax seeds, chocolate chips, or raisins!

Thanks for stopping by for my very first post! I hope these muffins will be a hit in your house like they are in mine!


PB&J Food Processor Muffins

2 cups Whole Wheat Flour
1/4 cup granulated sugar
1 tsp baking powder
1/2 tsp baking soda
1 cup chunky peanut butter
1 cup milk (soy milk works great too)
2 eggs
1 tsp vanilla
1 cup jelly or jam (any flavor)

Combine all ingredients in the food processor. Pulse until mixed well. Scrap sides of bowl to ensure that everything is mixed. Spray muffin tin with cooking spray or use cupcake liners. Pour batter into muffin tins and bake at 400 degrees for 15-20 minutes.

Using a piping bag, add jelly. After the muffins have cooled slightly pipe the jelly in to the bottom of each muffin. Serve warm or freezer in gallon freezer bags.


I'm linking up to these parties:

Popular Posts

Blogger templates

Blogger news

Blogroll